


I think I distilled this into a process.
Middle click the model null
Render > Texture > Image --- find image
pin down window with the keyhole icon on top.
Render > Porperty > Texture Projection > Create new Texture Projection
press OK
Press Edit > Freeze
on the right panel
try the animation.
a5'
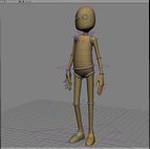
Starting an Animation - from scratch
Re: Starting an Animation - from scratch
watch the game starts after you accept the part, to redirect your mind.
--n.O.[SP]
--n.O.[SP]

Re: Starting an Animation - from scratch
I think the Noesis training videos would help you, especially with your texturing problems - take a look at the dynamite prop videos - http://www.moddb.com/groups/noesis-inte ... /downloads
Re: Starting an Animation - from scratch
nope, no good.a5' wrote:I think I distilled this into a process.
Middle click the model null
Render > Texture > Image --- find image
pin down window with the keyhole icon on top.
Render > Porperty > Texture Projection > Create new Texture Projection
press OK
Press Edit > Freeze
on the right panel
try the animation.
a5'
I was hoping this would work. Honestly I have no idea what I am doing wrong. After clicking on everything trying this and that, I was able to get a faint look of the texture to appear through the default black color.
Re: Starting an Animation - from scratch
I did download these, they appear to be finish project. No clue how they got there.dwigfor wrote:I think the Noesis training videos would help you, especially with your texturing problems - take a look at the dynamite prop videos - http://www.moddb.com/groups/noesis-inte ... /downloads
Re: Starting an Animation - from scratch
Select the object the same way you textured it and press Shift 7
post that screen shot.
a5
post that screen shot.
a5
watch the game starts after you accept the part, to redirect your mind.
--n.O.[SP]
--n.O.[SP]
-
Hirazi Blue

- Administrator
- Posts: 5107
- Joined: 04 Jun 2009, 12:15
Re: Starting an Animation - from scratch
Okay, here's what I did, after finally installing the Mod Tool on my internet laptop... (this is the edited version, written when I had more time tonight)
I loaded the "IrisDoorPlateAnimated" and your "BrickWall" texture.
I've set my Camera View to "Textured Decal" instead of "Textured" as this didn't seem to work for me (laptop-graphics?).
I selected every plate, assigned a separate texture projection to it. Next I created and assigned a material to one of the plates and then copied this by selecting all the other plates, then using "Material > Assign Material" and picking the first plate to get the material from (so they have one and the same material).
In the render tree I refreshed to bring up the material of a selected plate, I brought in the texture (the "BrickWall"), which I imported with "clip from file" and connected it to an "Image" node, which itself was plugged into the "diffuse" and "ambient" port of the Phong.
In the Texture Editor I brought in the texture/clip also.
Opening the PPG for the Image clip, I made sure the XSI Mod Tool uses the right texture projection (in this example the projection "Texture_Projection (Planar XY) on the object "polymsh1").
There's obviously much room for improvement, but that's where the Texture Editor and the separate projections come in. Now you can go in and make the texture fit it's respective plate just the way you want to in the Texture Editor...
PS - the window on the top/left is the PPG of the image node in the render tree...
As you can easily see, I am no texture guru either ,
,
but I think/hope this might help you along slightly... ;)
edit (again):
Another approach for the texturing would be to "create (a) group" with all the plates in it, select this group and assign one texture_projection PlanarXY to it. That one all plates are assigned to the same texture_projection.
Select all plates, go into the texture editor, find the "freeze" command there, which does something different from the "freeze" command on the right side of your interface, to stop the texture from magically changing during the animation.
I loaded the "IrisDoorPlateAnimated" and your "BrickWall" texture.
I've set my Camera View to "Textured Decal" instead of "Textured" as this didn't seem to work for me (laptop-graphics?).
I selected every plate, assigned a separate texture projection to it. Next I created and assigned a material to one of the plates and then copied this by selecting all the other plates, then using "Material > Assign Material" and picking the first plate to get the material from (so they have one and the same material).
In the render tree I refreshed to bring up the material of a selected plate, I brought in the texture (the "BrickWall"), which I imported with "clip from file" and connected it to an "Image" node, which itself was plugged into the "diffuse" and "ambient" port of the Phong.
In the Texture Editor I brought in the texture/clip also.
Opening the PPG for the Image clip, I made sure the XSI Mod Tool uses the right texture projection (in this example the projection "Texture_Projection (Planar XY) on the object "polymsh1").
There's obviously much room for improvement, but that's where the Texture Editor and the separate projections come in. Now you can go in and make the texture fit it's respective plate just the way you want to in the Texture Editor...
PS - the window on the top/left is the PPG of the image node in the render tree...
As you can easily see, I am no texture guru either
but I think/hope this might help you along slightly... ;)
edit (again):
Another approach for the texturing would be to "create (a) group" with all the plates in it, select this group and assign one texture_projection PlanarXY to it. That one all plates are assigned to the same texture_projection.
Select all plates, go into the texture editor, find the "freeze" command there, which does something different from the "freeze" command on the right side of your interface, to stop the texture from magically changing during the animation.
Stay safe, sane & healthy!
Re: Starting an Animation - from scratch
Hirazi, thank you for explaing this for me. I was lost for a while.
Ok, cool, now I can see the texture being applied. Who would have thunk, so what it the diff between Textured & Texture Decal? So now I can see the vision I had. I wander if this will cause othe issues when I export to my XNA project???
So now I need to be able to define the UV map to use, right now the default is putting 4 sets of texture in each quad. I was also able to change from moving the texture with the plates to somthing that looks like the door opens like a portal, so I am trying to determine what those settings are so I could interchange them at whim.
It is soooo cool when things work.
Re: Starting an Animation - from scratch
Well, I discovered a new issue with this model, nothing that could not be fixed. When I attempted to give the door depth, I just extruded the polies. Well that left an open face which did not show up until the texture was applied. All I had to do was to duplicate the original polies and extrude one of them.
After a bit of rework, I managed to get the door to work as desired. I will add an animation video when able..
Thanks to everyone for you input and help. Now I will try to import this into my XNA app...
After a bit of rework, I managed to get the door to work as desired. I will add an animation video when able..
Thanks to everyone for you input and help. Now I will try to import this into my XNA app...
-
Hirazi Blue
- Administrator
- Posts: 5107
- Joined: 04 Jun 2009, 12:15
Re: Starting an Animation - from scratch
I was wondering, what kind of hardware you're trying to run your Mod Tool on, as there are some general Softimage-related improvements one can try to make in the realm of performance on older computers / lower quality graphic cards and such?
;)
;)
Stay safe, sane & healthy!
Who is online
Users browsing this forum: No registered users and 10 guests